
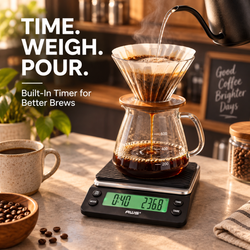
Roasting coffee starts and ends with a weight. You measure green beans before charging the roaster, then weigh the roasted coffee after cooling. Those two numbers help you track yield, compare batches, plan packaging, and investigate why a familiar coffee behaved differently this time. A scale also helps when you portion samples for cupping or weigh coffee for a test brew. Yet the best scale for each job may be different.
For a home roaster making a few hundred grams at a time, a stable scale with 0.1-gram readability and enough capacity for the beans plus the container is often a practical choice. For a larger batch, capacity and platform size matter more than showing two decimal places. A compact brewing scale can be excellent for samples but wholly unsuitable for a multi-kilogram production batch. This guide explains how to choose based on what you actually weigh, how to check that readings are trustworthy, and when two scales make more sense than one.
Why weighing matters in coffee roasting
Green coffee and roasted coffee do not weigh the same. As beans heat, they lose water and other volatile material while changing chemically and physically. The National Coffee Association’s overview of roasting explains the transformation from green to roasted beans; research on the kinetics of mass loss during arabica roasting shows why mass change is a measurable part of the process.
Weighing lets you calculate roast weight loss:
Weight loss (%) = (green coffee weight − roasted coffee weight) ÷ green coffee weight × 100
If you start with 500 g of green coffee and recover 425 g after cooling, the loss is 75 g, or 15%. That number is useful in context: compare it with the same coffee, similar starting moisture, comparable equipment, and a consistent weighing procedure. It is not a universal roast-quality score. A higher loss does not, by itself, prove that the coffee will taste better or that two different coffees reached the same roast level.
Weight also informs purchasing and packing. At the example yield above, a planned 425 g of roasted coffee requires roughly 500 g of green coffee before accounting for handling loss or additional sorting. If you sell coffee, record the actual batch yield rather than assuming every origin and roast profile will return the same amount. For a small roaster, this is often the most immediate payoff from a reliable scale: fewer guesses about inventory and fewer mismatched bags.
Start with your largest real weighing task
Capacity is the maximum load the scale can support. It includes every item resting on the platform, even when you press tare and the display returns to zero. A 3,000 g scale does not become a 3,000 g bean-only scale after a 600 g bowl has been tared. It has approximately 2,400 g of remaining load capacity, subject to the model’s operating rules.
Before shopping, write down three numbers: the heaviest empty container you use, your largest typical batch, and the amount of headroom you want for variations. Add the first two; then choose a capacity comfortably above the total. For example, a 300 g tray and 700 g of green beans require at least 1,000 g, and a scale rated at precisely 1,000 g leaves no useful margin. If the batch grows to 900 g, you will already need a different instrument.
For small batch work, the AMW-2000 compact digital bench scale lists a 2,000 g capacity with 0.1 g readability. It can be considered when the combined load stays below that limit and the platform fits the chosen container. The BARISTA-3KG coffee and kitchen scale lists 3,000 g by 0.1 g, a built-in timer, and a platform measuring 3.94 by 4.72 inches. Those specifications make it versatile for small batches, sample prep, and brewing, but check whether a cooling tray sits securely without obscuring the display.
For a roaster handling several kilograms at once, look for a dedicated higher-capacity bench or platform scale with a larger deck. Do not divide a single batch across multiple weighings unless you can control spills, taring, and recordkeeping carefully. The convenience of a larger platform and sufficient capacity will usually matter more than an extra decimal place.
Readability is not the same as accuracy
Scale listings often say “0.1 g” or “0.01 g.” That number generally describes the smallest step shown on the display, also called readability or resolution. It does not promise that every reading is accurate to within that amount. Accuracy also depends on calibration, repeatability, placement, load distribution, temperature, vibration, and the instrument’s actual performance.
The National Institute of Standards and Technology’s balance and scale resources treat calibration and measurement uncertainty as separate, practical issues. At home, you do not need a laboratory uncertainty budget to benefit from the distinction. You do need to resist choosing a scale solely because its display has more digits.
For a 500 g roast batch, 0.1 g steps are usually more than fine enough to calculate a meaningful weight-loss percentage. A 0.1 g change in a 500 g starting weight is only 0.02 percentage points of the batch. It is easy for inconsistent cooling, retained chaff, a bean spilled during transfer, or a warm container to create a larger practical difference. By contrast, 1 g steps may be perfectly acceptable for multi-kilogram production batches, depending on the precision your process requires.
Fine readability becomes more useful when you weigh a 12 g or 20 g brewing dose, portion a small roasted sample, or compare narrow differences in a test recipe. A 0.01 g pocket scale may be useful for tiny samples, but its lower capacity and smaller platform can make it frustrating for green coffee batches. Choose a range that matches the job; never assume that more decimal places automatically make a better roasting scale.
Repeatability makes your batch records useful
Repeatability means a scale gives nearly the same result when you weigh the same object repeatedly under the same conditions. If a container reads 500.0 g, then 503.2 g, then 499.4 g without anything changing, the extra decimal place does not help your roasting log.
Test a new scale with an appropriate check weight and a familiar container. Put the scale on a hard, level surface, zero it, place the object near the platform center, remove it, and repeat several times. Do this at a load similar to your actual work, not only with a very light object. Then test whether the reading changes when the same object is placed at reasonable positions on the platform. A small change may be normal for some consumer scales, but large or erratic differences warrant troubleshooting.
Air movement, fans, a rocking workbench, or a tray touching the counter can all disturb the result. So can low batteries. The useful question is whether the scale performs reliably in your roasting space. NIST’s measurement process guidance distinguishes repeatability, reproducibility, stability, and calibration; these ideas are especially helpful when your batch log begins showing unexpected shifts.
Platform size and display position
The bean container is part of the measurement setup. A small platform may support a narrow cup well but let a broad metal cooling tray wobble or overhang. An overhanging tray is not automatically a problem if it is stable and touches nothing else, but it can hide the display, shift easily, or rest against nearby objects. Any contact with a counter, roaster, cable, or your hand can transfer some weight away from the sensor.
Measure the base of your usual bowl or tray before selecting a scale. Consider where the display sits: will the container block it, and can you still reach tare without moving the tray? A backlit screen is valuable in a dim roasting area, while a remote or raised display can help with larger bins. A stainless steel or otherwise wipeable platform is easier to keep free of chaff and coffee dust. You should also confirm that the scale’s feet sit firmly on the bench, away from roaster vibrations.
If you roast in a garage or near a fan, move the scale to a calmer measurement station. Never set a hot drum, cooling tray, or fresh metal part directly on a consumer scale unless its instructions explicitly allow that temperature and loading. Transfer beans into a suitable container, let the setup reach a safe, stable condition, and use the same timing each batch so your comparisons mean the same thing.
Tare should be fast and predictable
Tare subtracts the weight of a container from the displayed value. Place the empty bowl on the scale, press tare, wait for zero, and add beans. This is convenient for green coffee dosing and post-roast yield checks. It is also useful when portioning roasted coffee into several bags, provided you do not exceed the total capacity along the way.
Check how the scale behaves when you remove a tared bowl or add small amounts slowly. Some models have auto-off settings, response delays, or minimum increments that interfere with repetitive packing work. A display that sleeps mid-task may be more troublesome than a small difference in advertised resolution. If you regularly fill bags, test your workflow with the actual bag or dosing cup, including the time it takes between additions.
Remember that taring does not erase the physical load. If your scale’s maximum is 2 kg, an 800 g bowl leaves roughly 1.2 kg for coffee even after the display reads zero. Overloading can produce an error, an unreliable reading, or damage. When the full batch and container are close to capacity, move up to a bigger scale instead of trying to work around the limit.
Calibration, check weights, and a useful routine
A scale that read correctly last month can drift or behave differently after a move, impact, low-battery event, or change in operating conditions. Build a quick check into your roasting routine. Inspect the platform, set the instrument on a firm surface, let it settle as directed, confirm that the empty reading is zero, and place a suitable known weight on the platform. Record any persistent discrepancy.
Checking a scale and adjusting its calibration are different actions. A check asks whether a known reference displays as expected. Calibration or user adjustment follows a specific model procedure. The required reference weight and button sequence differ by instrument; guessing can worsen the result. AWS explains the distinction and setup in its digital scale calibration guide.
Do not substitute a coffee bag with a printed net weight for an appropriate reference mass. Packaging tolerances and the weight of the bag itself make it an unreliable calibration reference. NIST notes that calibration intervals should be based on the measurement program and evidence, not a universal calendar rule. For casual home roasting, periodic checks and extra checks after a move or impact are sensible. A business should follow its own documented quality and any applicable legal metrology requirements for transactions.
If a scale repeatedly misses a suitable check weight, replace the batteries, clean beneath and around the platform, confirm the surface is stable, and consult the exact manual. If the problem remains, stop treating its batch data as reliable until the instrument is corrected or replaced.
One scale or two for roasting and brewing?
Roasting, cupping, and brewing share a need for measured quantities, but their load ranges differ. Your batch scale may need to hold a large tray and several kilograms of coffee. Your brewing scale needs convenient tare, a readable display, enough capacity for a dripper or carafe, and often a timer. A small sample scale is useful for weighing modest doses in a tasting lab.
The Specialty Coffee Association publishes coffee standards including sample preparation and tasting mechanics. Its research on brewing ratios and sensory outcomes illustrates why consistent coffee and water masses matter when you compare roast results in the cup. A roasting log tells you what changed during production; a controlled brew helps you evaluate the flavor consequences.
If you roast only 100 to 500 g at a time, one good 2 to 3 kg scale may cover green beans, cooled roasted beans, and brewing. The AWS LB-3000 overview describes another 3,000 g by 0.1 g bowl-scale option, while explaining that it lacks a built-in timer. For a commercial roaster, a higher-capacity platform scale for batches plus a small precision scale for samples will generally be easier to use. Browse the AWS pocket scale selection for small-dose work, but match the individual model’s capacity and platform to your sample container.
A simple weighing workflow for consistent roast logs
Consistency matters as much as the scale’s specification. Set up one designated weighing station away from strong drafts and roaster vibration. Decide which container you will use for green coffee and which for the cooled roast. Label them or use the same containers each time so staff do not accidentally include an unfamiliar tare weight.
Before charging the roaster, check zero, place the green-coffee container on the platform, tare, and add the batch. Record the actual green weight, not just the target. Note the coffee name, lot, batch number, date, roaster, and any relevant process details. If you remove defects or stones before charging, decide whether your official starting weight is before or after that sorting step and keep the convention consistent.
After the roast, cool the beans according to your normal process. Weigh the recovered roasted coffee at a consistent stage after cooling, using a clean, dry container. Record the actual weight and any separately measured chaff or sorting loss if those details matter to your operation. Apply the weight-loss formula and keep the raw green and roasted weights alongside the percentage. A percentage alone makes it harder to trace data-entry errors later.
As an example, suppose batch A starts at 800 g green and ends at 680 g roasted: loss is 120 ÷ 800 × 100 = 15%. Batch B starts at 800 g and ends at 664 g: loss is 136 ÷ 800 × 100 = 17%. That is a two-percentage-point difference worth investigating. Check the roast profile, bean lot, starting condition, cooling method, and weighing procedure before concluding that the scale or roast level alone caused it.
If you prepare small test brews, weigh a consistent dose and water amount as well. Keep grind setting, brew method, and tasting conditions reasonably steady. The point of the log is to connect the measured roast to a repeatable tasting comparison, not to make every coffee fit a single target percentage.
Choosing by batch size and purpose
For sample roasting and cupping, prioritize a stable 0.1 g scale that can hold your sample container. A smaller high-resolution scale may help with tiny doses, but only if its platform and capacity fit the task. If you need to weigh a full cooling tray, calculate that total load first.
For home roasting in the hundreds of grams, a 2,000 to 3,000 g class scale with 0.1 g readability often offers a useful combination of capacity and detail. Compare the actual platform, container clearance, tare response, and available calibration instructions. The timer on a coffee-focused model is a bonus for brewing, not an essential roasting feature.
For one- to several-kilogram batches, capacity must grow with the tray or bin. A compact 3 kg scale may be sufficient for a one-kilogram batch and a light container, yet unsuitable for a heavier vessel or a larger planned batch. If your normal combined load approaches the rating, choose a sturdier, higher-capacity platform model. Decide how fine the reading must be for your records; 1 g increments may be reasonable at this scale if repeatability is good.
For production roasting and packing, separate tasks can justify separate instruments: one high-capacity batch scale, one compact sample or brewing scale, and perhaps a dedicated packing scale. The right setup depends on throughput, container dimensions, workflow, and any requirements governing goods sold by weight. Review the broader AWS kitchen scale range for smaller bench tasks, then compare higher-capacity options for full batches rather than assuming a coffee-branded model covers every station.
Common mistakes to avoid
Buying by decimal places alone. A display showing 0.01 g cannot rescue an unstable bench or a platform too small for the tray. Look at the total system and test repeatability.
Ignoring the container. Capacity includes the bowl, cooling tray, and anything else resting on the platform. Tare changes the displayed zero, not the physical load.
Weighing at different stages each time. A hot tray one day and cooled beans in a different container the next create avoidable variation. Use a repeatable cooling and transfer routine.
Comparing weight loss across unrelated coffees as a score. Starting conditions, coffee type, roast profile, and equipment affect the result. Track the number alongside sensory evaluation and roast data.
Using a scale too close to the roaster. Heat, drafts, chaff, and vibration can make readings difficult to trust. Give weighing its own stable spot.
Treating tare as calibration. Tare subtracts a container weight; it does not verify or correct the scale against a known reference.
Using a tiny pocket scale for a large roast. Small scales can excel at dose prep, but their capacity and platforms are often wrong for batch yield.
Frequently asked questions
What accuracy do I need for roasting coffee?
For many home batches measured in hundreds of grams, 0.1 g readability is ample; reliable repeatability and appropriate capacity matter more than extra digits. For larger batches, 1 g readability may meet your needs. Check the manufacturer’s accuracy information where available, and verify performance with a suitable reference weight. Readability alone is not an accuracy guarantee.
Can I use a coffee brewing scale for roasting?
Yes, if the total weight of beans and container is below its capacity and the platform supports the container safely. A brewing scale is particularly convenient for sample roasting and test brews. Large trays and production batches usually call for a bigger platform scale.
When should I weigh roasted beans?
Choose a consistent point after your normal cooling step. Avoid placing hot equipment on a scale unless the manufacturer permits it. Record your method so later batches are compared on the same basis.
Is a 0.01 g scale better than a 0.1 g scale?
It can be useful for small samples, but the finer display does not make it a better batch scale. Its capacity, platform size, repeatability, and calibration still have to match the workload.
Can roast weight loss tell me whether the coffee tastes good?
It is a helpful process measurement, not a sensory verdict. Use it with roast profile data and a consistent tasting or brewing method. Investigate unexpected changes, then confirm what matters in the cup.
The best scale is the one that fits your actual batches
Choose capacity from your largest beans-plus-container load, leave room to grow, and pick a platform that supports the vessel without hiding the display. For small roasts, 0.1 g readability, dependable tare, and repeatable measurements are a strong starting point. For larger roasts, a stable, suitably sized platform is the priority. Keep a proper check weight and a simple weighing routine so the numbers in your log remain comparable. When batch weighing and sample brewing pull in different directions, two purpose-matched scales are often the cleanest solution.