
Choosing a scale for 3D printing materials starts with two questions:
What is the smallest quantity you need to measure?
and:
What is the heaviest complete object or material load you will place on the scale?
Those answers help determine the right combination of:
-
Capacity
-
Readability
-
Accuracy requirements
-
Minimum usable load
-
Repeatability
-
Tare
-
Calibration
-
Platform size
For many small material-development tasks involving resin, pigments, additives, filament samples and lightweight printed parts:
100–500g × 0.01g
is a useful range.
For broad precision versatility:
500g × 0.01g
is especially practical.
For:
-
Complete filament spools
-
Large resin containers
-
Large prototypes
-
Heavy printed assemblies
2–5kg × 0.1g
may make considerably more sense.
The best scale is not the one with the most decimal places.
It is the one whose measurement range matches the way you actually use your 3D printer.
Quick Guide: Which Scale Do You Need for 3D Printing Materials?
| Application | Suggested Capacity | Suggested Readability |
|---|---|---|
| Resin pigments | 100–500g | 0.01g |
| Resin colorants | 100–500g | 0.01g |
| Small resin samples | 200–500g | 0.01–0.1g |
| Small additives | 100–500g | 0.01g |
| Filament samples | 100–500g | 0.01g |
| Small printed parts | 100–500g | 0.01g |
| Medium printed parts | 500g–2kg | 0.1g |
| Partial filament spools | 1–2kg+ | 0.1–1g |
| Full filament spools | 1–2kg+ | 0.1–1g |
| Resin bottles | 1–5kg+ | 0.1–1g |
| Large printed assemblies | 2–5kg+ | 0.1–1g |
| Genuine milligram-level work | Low-capacity precision scale | 0.001g when actually required |
For many small 3D-printing material applications:
500g × 0.01g
is an excellent starting point.
Step 1: Decide What You Actually Need to Weigh
3D printing covers several very different weighing applications.
You may want to weigh:
-
Liquid resin
-
Pigments
-
Resin additives
-
Colorants
-
Filament samples
-
Full filament spools
-
Partial filament spools
-
Support material
-
Printed parts
-
Prototype components
-
Finished assemblies
The scale that works for:
0.25g of pigment
is not necessarily appropriate for:
1.2kg of filament and spool.
Start with your actual workflow rather than buying based on a general "3D printing scale" label.
Step 2: Identify Your Smallest Normal Measurement
Suppose your routine work includes:
Resin = 50g
Pigment = 0.45g
Filament sample = 5g
Printed part = 12g
The smallest quantity is:
0.45g
That immediately tells you a whole-gram scale will be too coarse for part of your workflow.
A:
0.01g scale
provides much more useful measurement detail.
Step 3: Understand Capacity and Readability
Digital scales are commonly described using a format such as:
500g × 0.01g
The first number is capacity.
The second is readability.
In this example:
500g = maximum nominal capacity
0.01g = smallest displayed increment
AWS explains this relationship in What Does 500g × 0.01g Mean on a Digital Scale?.
Both specifications need to match your application.
Step 4: Decide Whether 1g Readability Is Enough
A 1g scale displays:
500g
501g
502g
This can work well for:
-
Full filament spools
-
Large resin bottles
-
Heavy printed parts
-
Large assemblies
-
Rough material inventory
If you are weighing kilogram-sized objects, whole-gram readability may sometimes provide enough information.
But it is generally too coarse for tiny pigments or small printed parts.
Step 5: Decide Whether You Need 0.1g
A 0.1g scale displays:
25.0g
25.1g
25.2g
This can be useful for:
-
Medium printed parts
-
Resin batches
-
Filament consumption
-
Prototype comparison
-
Support material
-
Larger samples
For many moderate 3D-printing applications:
0.1g readability
provides a good balance between useful detail and higher capacity.
Step 6: Decide Whether You Need 0.01g
A 0.01g scale displays:
5.00g
5.01g
5.02g
This level is useful for:
-
Resin pigments
-
Fine additives
-
Small colorant quantities
-
Filament samples
-
Lightweight printed parts
-
Miniatures
-
Small prototype components
For many precision material measurements:
100–500g × 0.01g
is a useful range.
Step 7: Decide Whether You Really Need 0.001g
A 0.001g scale displays:
5.000g
5.001g
5.002g
Because:
0.001g = 1mg
this is commonly called milligram readability.
Most ordinary 3D-printing work does not require it.
AWS compares these precision classes in 0.001g vs. 0.01g Scales: Which Precision Do You Need?.
Milligram-resolution scales may also be more sensitive to:
-
Air movement
-
Mechanical vibration
-
Static
-
Temperature
-
Surface instability
Choose 0.001g only when your actual measurement requirement genuinely calls for it.
Step 8: Do Not Confuse Readability With Accuracy
Suppose your scale displays:
12.35g
That tells you it has 0.01g readability.
It does not automatically guarantee:
±0.01g accuracy.
Readability is only one specification.
Also consider:
-
Accuracy specifications
-
Repeatability
-
Minimum usable load
-
Calibration
-
Environmental conditions
NIST's Calibration of Mass Standards provides broader technical context on mass measurement and calibration.
The practical rule is:
more decimal places do not automatically mean greater accuracy.
Step 9: Consider Minimum Usable Load
A:
500g × 0.01g
scale displays changes of 0.01g.
That does not necessarily mean:
0.01g
is an appropriate working quantity.
The smallest reliably useful load may be higher.
This matters especially when measuring:
-
Tiny pigments
-
Fine resin additives
-
Extremely lightweight parts
Review available manufacturer specifications instead of assuming the readability equals the minimum working load.
Step 10: Consider Repeatability
Repeatability matters when comparing parts or recreating material experiments.
Suppose the same stable printed component is weighed repeatedly.
A consistent result might be:
12.45g
12.45g
12.44g
12.45g
12.45g
An inconsistent result might be:
12.45g
12.73g
12.21g
12.59g
12.30g
AWS explains several causes of changing readings in Why Does My Digital Scale Give Different Readings?.
Step 11: Find Your Heaviest Complete Load
Capacity should be based on the entire physical load.
For liquid material:
container + material
For a filament spool:
spool + remaining filament
For printed objects:
entire finished component or assembly
Suppose:
Resin cup = 100g
Resin = 300g
Pigment = 2g
Total:
402g
A 500g scale can support that load.
Step 12: Remember That Containers Count
Suppose:
Scale capacity = 500g
Empty resin container = 150g
Material = 300g
Total:
450g
That leaves only:
50g
of nominal headroom.
Never choose capacity based only on the material mass.
Step 13: Tare Does Not Restore Capacity
Place the 150g container on the scale.
Press tare.
Display:
0.00g
The scale is still physically supporting:
150g
Approximate remaining nominal capacity:
350g
Tare changes the displayed value.
It does not increase the mechanical load limit.
Step 14: Leave Capacity Headroom
Suppose your routine load is:
490g
and your scale capacity is:
500g
Remaining headroom:
10g
That provides very little flexibility.
If your normal objects approach 500g, consider a:
1kg or 2kg
scale instead.
Step 15: Choose Between 100g, 200g and 500g
100g Capacity
Useful for:
-
Tiny pigment tests
-
Small resin-additive experiments
-
Small printed parts
-
Short filament samples
Its biggest limitation is container weight.
200g Capacity
Useful for:
-
Small resin samples
-
Pigment development
-
Lightweight printed pieces
-
Filament samples
This provides more flexibility while remaining compact.
500g Capacity
Useful for:
-
Resin samples
-
Pigments
-
Additives
-
Small printed components
-
Filament samples
-
Small prototype assemblies
-
Weighing trays
For many precision 3D-printing workflows:
500g × 0.01g
is one of the most versatile compact configurations.
Step 16: Know When You Need More Than 500g
A 500g scale is not appropriate for many larger 3D-printing objects.
Examples include:
-
Complete filament spools
-
Heavy partial spools
-
Large printed prototypes
-
Resin bottles
-
Assemblies
For these:
1–5kg
or more may be required.
Do not sacrifice needed capacity solely to obtain finer readability.
Step 17: Choose a Scale for Resin Printing
Resin-printing workflows can include both large and tiny quantities.
For a main resin quantity:
0.1g readability
may often be sufficient.
For pigments and additives:
0.01g readability
can be much more useful.
AWS provides broader guidance in Best Digital Scale for Resin.
Step 18: Choose a Scale for Resin Pigments
Suppose your resin color formula contains:
Base resin = 50.00g
Black pigment = 0.45g
Blue pigment = 0.20g
Metallic pigment = 0.15g
For the pigment quantities:
100–500g × 0.01g
provides useful measurement detail.
Always follow manufacturer-specific compatibility and concentration instructions.
Step 19: Handle Resin According to Manufacturer Guidance
A digital scale measures mass.
It does not determine whether materials are safe to combine.
Follow the exact resin manufacturer's guidance for:
-
Handling
-
Storage
-
Pigment compatibility
-
Post-processing
-
Protective equipment
Formlabs provides resin and printer safety guidance covering safe handling of liquid photopolymer materials.
Precision weighing does not replace proper resin safety.
Step 20: Choose a Scale for Filament Samples
Small filament samples may weigh only several grams.
Example:
Sample A = 5.25g
Sample B = 5.48g
Sample C = 5.12g
A:
0.01g scale
provides clear comparative measurements.
This can be useful for material tests and small extrusion comparisons.
Step 21: Choose a Scale for Full Filament Spools
Complete filament spools require much greater capacity.
If:
Spool + filament = 850g
a 500g precision scale cannot handle it.
For many normal spools:
1–2kg or greater
capacity is more practical.
For larger-format spools, choose even higher capacity.
Step 22: Estimate Remaining Filament by Weight
A scale can help estimate remaining filament.
Use:
current spool mass − known empty spool mass = approximate filament remaining
Example:
Loaded spool = 725g
Empty spool = 225g
Estimated filament:
500g
Use the actual empty-spool weight for the specific spool design.
Do not assume all empty spools weigh the same.
Step 23: Keep Filament Storage Conditions in Mind
Mass alone does not tell you whether filament is in good printing condition.
Some polymers absorb environmental moisture.
UltiMaker's 3D printer filament storage guide discusses appropriate filament storage and moisture considerations.
The distinction is important:
a scale measures mass, not material condition.
Step 24: Choose a Scale for Small Printed Parts
Suppose:
Part A = 6.45g
Part B = 6.18g
Part C = 5.92g
A:
0.01g scale
provides useful comparative detail.
This can help when examining:
-
Design revisions
-
Infill changes
-
Wall-count changes
-
Material changes
-
Lightweighting experiments
Step 25: Choose a Scale for Larger Printed Parts
Suppose a finished prototype weighs:
1,750g
A 500g precision scale is unusable regardless of how fine its readability is.
For larger prints:
2–5kg
capacity may be required.
At that size:
0.1g
or even coarser readability may be adequate depending on the purpose.
Step 26: Choose a Scale for Prototype Comparisons
A digital scale can add another measurement to your design-development process.
Suppose:
Prototype A = 74.2g
Prototype B = 69.8g
Prototype C = 64.5g
Weight measurements can complement:
-
CAD data
-
Slicer estimates
-
Print-time data
-
Material estimates
A scale provides actual physical mass after printing.
Step 27: Do Not Assume Weight Explains the Cause of a Difference
If two printed parts weigh differently, the cause might include:
-
Geometry changes
-
Infill
-
Wall thickness
-
Material differences
-
Support material
-
Residual resin
-
Moisture
-
Post-processing
The scale identifies a mass difference.
It does not identify why the difference exists.
Step 28: Choose a Scale for Support Material
Support material can also be weighed.
For small samples:
100–500g × 0.01g
may be useful.
For full support-material spools:
1kg+
capacity may be required.
Again, distinguish between weighing:
samples
and:
entire spools.
Step 29: Platform Size Matters
The scale must physically support what you are weighing.
Consider whether the platform will hold:
-
A resin container
-
A filament spool
-
A printed part
-
A prototype assembly
-
A weighing tray
A scale with sufficient capacity can still be awkward if the platform is too small.
Step 30: Avoid Partial Support
Do not allow a large printed object to rest partly on the scale and partly on the workbench.
Any external support changes the load measured by the scale.
Use an instrument with an appropriately sized platform.
Step 31: Make Sure the Scale Has Tare
Tare is particularly useful when weighing resin or loose components.
Example:
Empty cup = 40.00g
Place it on the scale.
Press tare.
Display:
0.00g
Add resin:
50.00g
The scale now displays the resin mass directly.
Step 32: Sequential Tare Can Simplify Experiments
Suppose:
Base resin = 50.00g
Pigment = 0.45g
Additive = 0.20g
You may record one component, tare, and add the next.
Remember:
all components continue contributing to total physical capacity.
Step 33: Check Calibration Before Buying
Before purchasing a scale, determine:
-
Is it calibratable?
-
What calibration mass does it require?
-
Is the calibration weight included?
-
Are instructions provided?
AWS explains the general process in How to Calibrate a Digital Scale for Accurate Results.
Use the instructions for the exact scale.
Step 34: Do Not Assume Capacity Equals Calibration Weight
A 500g scale does not automatically use a:
500g calibration weight.
It might require:
-
200g
-
500g
-
Another specified mass
depending on the scale.
Always verify the model's calibration procedure.
Step 35: Use the Correct Calibration Reference
Do not substitute:
-
Printed calibration cubes
-
Filament samples
-
Printer parts
-
Coins
-
Batteries
-
Resin containers
for an appropriate calibration reference.
NIST's Calibration Procedures for Weights and Measures Laboratories provides broader technical background on mass calibration.
For normal workshop use, follow the scale manufacturer's instructions.
Step 36: Use a Stable Surface
A precision scale should sit on a:
-
Hard
-
Flat
-
Rigid
-
Stable
surface.
Avoid:
-
Flexible mats
-
Carpet
-
Soft surfaces
-
Unstable tables
3D-printing workstations can contain several vibration sources, making surface stability especially important.
Step 37: Keep the Scale Away From Printer Vibration
Operating printers can transmit vibration through a shared bench.
Other vibration sources include:
-
Resin mixers
-
Wash stations
-
Air compressors
-
CNC tools
-
Rotary tools
When making fine measurements, use a stable surface away from active machinery whenever practical.
Step 38: Control Airflow
3D-printing environments often use:
-
Ventilation
-
Fans
-
Air filtration
-
Enclosures
-
Exhaust systems
Fine-resolution scales can react to drafts.
Keep the weighing area away from direct airflow.
Step 39: Consider Static
Static can become relevant around:
-
Plastic filament
-
Printed components
-
Plastic trays
-
Pigment powders
This is especially noticeable with very small quantities.
Static may cause fine material to cling to containers or transfer tools.
Step 40: Consider Temperature Stability
Avoid expecting immediate maximum consistency after moving a scale from:
cold storage → warm workshop
or:
hot workspace → air-conditioned room
Allow the scale to stabilize according to manufacturer instructions.
Step 41: Choose a Clear Display
A good scale should make decimal placement obvious.
Compare:
0.25g
with:
2.50g
Look for:
-
Clear digits
-
Backlighting
-
Good contrast
-
Easy decimal visibility
Make sure your container or printed part does not hide the display.
Step 42: Consider Weighing Trays
Trays can help with:
-
Small printed components
-
Filament samples
-
Support material
-
Pigments
-
Loose hardware
Basic workflow:
-
Place the tray on the platform.
-
Wait for stability.
-
Press tare.
-
Confirm zero.
-
Add the material.
-
Record the mass.
The tray still counts toward physical capacity.
Step 43: Protect the Scale From Liquid Resin
Liquid resin can damage precision equipment if it enters:
-
Buttons
-
Platform gaps
-
Display seams
-
Electronics
Use disposable cups and trays.
Any protective barrier should not interfere with free movement of the weighing platform.
Step 44: Decide Between Battery and AC Power
Battery Power
Useful for:
-
Mobile workstations
-
Moving between printers
-
Compact hobby areas
-
Occasional measurement
AC Power
Useful for:
-
Dedicated material stations
-
Repeated production work
-
Long measurement sessions
Power source should be considered after capacity and readability.
Step 45: Decide Whether You Need One Scale or Two
Suppose your complete measurement range is:
0.20g → 300g
A:
500g × 0.01g
scale may cover most applications.
Now suppose your range is:
0.20g → 3kg
One scale becomes much less practical.
A two-scale setup usually makes more sense.
Recommended Two-Scale Setup for 3D Printing
Precision Scale
500g × 0.01g
for:
-
Resin samples
-
Pigments
-
Additives
-
Filament samples
-
Lightweight printed parts
-
Miniature components
Higher-Capacity Scale
2–5kg × 0.1g
for:
-
Full filament spools
-
Large resin containers
-
Heavy printed parts
-
Prototype assemblies
-
Bulk materials
This gives each scale a more appropriate measurement range.
A Practical AWS Scale for Small 3D-Printing Materials
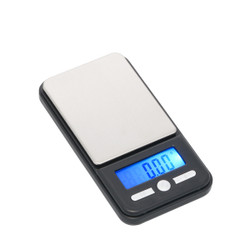
For many fine 3D-printing measurements, the AWS SC501g Precision Digital Pocket Scale provides:
500g capacity × 0.01g readability
Useful features include:
-
Stainless-steel weighing platform
-
Backlit LCD
-
Tare
-
Multiple weighing units
-
Two expansion trays
-
Compact design
-
Battery operation
You can review the AWS SC501g Precision Digital Pocket Scale for current specifications.
This capacity-resolution combination is especially practical for:
-
Resin samples
-
Pigments
-
Filament samples
-
Small printed components
-
Prototype pieces
When 500g × 0.01g Is Not the Right Choice
Choose a higher-capacity scale when:
-
You weigh full filament spools.
-
Your prints exceed 500g.
-
Your resin containers are heavy.
-
You weigh large assemblies.
-
Your normal load approaches the scale limit.
Choose finer than 0.01g only when:
-
Your actual measurement requirement genuinely calls for milligram-level resolution.
Example 1: Resin Pigment Experiment
Suppose:
Resin = 50.00g
Black pigment = 0.45g
Blue pigment = 0.20g
Secondary additive = 0.15g
A 0.01g scale provides useful detail for documenting each addition.
Follow all compatibility and concentration instructions from the manufacturers involved.
Example 2: Small Printed Component
Suppose:
Version A = 8.45g
Version B = 8.20g
Version C = 7.95g
A 0.01g precision scale clearly shows the differences.
Example 3: Partial Filament Spool
Suppose:
Current spool + filament = 675g
Known empty spool = 225g
Approximate remaining filament:
450g
Because the complete object weighs 675g, a 500g precision scale cannot be used.
Choose at least:
1kg capacity
with appropriate headroom.
Example 4: Large Prototype
Suppose:
Finished prototype = 2,100g
For this object:
3–5kg capacity
is more important than 0.01g readability.
Example 5: Filament Sample Comparison
Suppose:
Sample A = 6.25g
Sample B = 6.45g
Sample C = 5.90g
A 0.01g scale provides useful comparative data.
Interpretation should still consider:
-
Material type
-
Sample length
-
Diameter
-
Density
-
Moisture condition
Common Mistakes When Choosing a Scale for 3D Printing Materials
Buying Based Only on Decimal Places
More digits are not automatically better.
Confusing Readability With Accuracy
They are separate specifications.
Ignoring Minimum Usable Load
The smallest displayed increment may not be the smallest useful measurement.
Buying Too Little Capacity
Full filament spools and large prints can easily exceed 500g.
Forgetting Container Weight
Resin cups count toward capacity.
Assuming Tare Restores Capacity
It does not.
Ignoring Repeatability
Comparative experiments need consistent readings.
Choosing Too Small a Platform
Your spool or print needs proper support.
Ignoring Calibration
Choose a scale with a clear calibration procedure.
Using a Printed Calibration Cube as a Calibration Weight
Use the correct reference mass.
Weighing Next to an Operating Printer
Vibration can affect fine measurements.
Ignoring Airflow
Ventilation and fans can influence sensitive scales.
Ignoring Static
Plastic and fine powders can develop static.
Treating Weight as Proof of Print Quality
Mass is one measurement, not a complete quality assessment.
Assuming Filament Weight Tells You Moisture Condition
It does not.
Allowing Liquid Resin Into the Scale
Protect the instrument.
3D Printing Scale Selection Checklist
Before choosing a scale, ask:
-
Will I weigh resin, filament, printed parts or all three?
-
What is my smallest normal measurement?
-
What is my heaviest material quantity?
-
Will I weigh complete filament spools?
-
What do my empty spools weigh?
-
What is my heaviest printed part?
-
What is my largest complete physical load?
-
Do I need 1g readability?
-
Do I need 0.1g?
-
Do I need 0.01g?
-
Do I genuinely need 0.001g?
-
What accuracy specifications are provided?
-
What repeatability information is available?
-
What minimum usable load applies?
-
Is there sufficient capacity headroom?
-
Does the scale have tare?
-
Is sequential tare useful?
-
Is the platform large enough?
-
Can it support my spool or print properly?
-
Can I still see the display?
-
Can the scale be calibrated?
-
What calibration mass does it require?
-
Is that calibration weight included?
-
Are weighing trays included?
-
Can I protect it from resin?
-
Is my weighing surface stable?
-
Are nearby printers producing vibration?
-
Is there strong airflow?
-
Could static affect measurements?
-
Would two scales provide a better working range?
Frequently Asked Questions
What scale should I use for 3D printing materials?
For many small 3D-printing materials:
100–500g × 0.01g
is a useful range.
For larger objects and spools:
2–5kg × 0.1g
may be more appropriate.
Is 500g × 0.01g good for 3D printing?
Yes.
It is especially useful for:
-
Resin samples
-
Pigments
-
Additives
-
Filament samples
-
Small printed parts
What scale should I use for resin printing?
For small resin and pigment work:
100–500g × 0.01g
can be useful.
For larger resin quantities, select greater capacity.
What scale should I use for filament?
For small samples:
100–500g × 0.01g
may be useful.
For full filament spools:
1–2kg or greater capacity
is typically more practical.
Can I weigh filament to see how much is left?
Yes.
If you know the empty spool weight:
loaded spool − empty spool = approximate filament remaining
Does every empty spool weigh the same?
No.
Use the empty mass of the specific spool type you are measuring.
What scale should I use for small printed parts?
A:
0.01g scale
can provide useful detail for lightweight components.
What scale should I use for large printed parts?
For kilogram-scale prints:
2–5kg or greater capacity
may be more important than fine resolution.
Do I need 0.001g for 3D printing?
Usually not.
Choose 0.001g only when your actual measurement requirement genuinely requires it.
Does tare restore capacity?
No.
Tare changes the display but does not remove the physical mass already on the scale.
Can weight tell me whether a print is good?
Not by itself.
Mass can be useful for comparison, but print quality also depends on geometry, dimensions, surface quality, mechanical properties and process conditions.
Can weight tell me if filament is dry?
No.
A scale measures mass, not filament moisture condition.
Why does my scale fluctuate beside my 3D printer?
Possible causes include:
-
Printer vibration
-
Ventilation airflow
-
Static
-
Temperature changes
-
Work-surface instability
-
Weak batteries
-
Calibration problems
Should I calibrate a scale used for 3D printing?
Follow the instructions for the exact model, especially when repeatable comparisons matter.
Can I use a printed calibration cube to calibrate the scale?
A printed cube should not substitute for the calibration reference specified by the scale manufacturer.
Should I use one scale or two?
If your work ranges from tiny pigments to multi-kilogram prints or spools, two scales are often more practical:
500g × 0.01g
for fine materials,
plus:
2–5kg × 0.1g
for larger objects.
Final Verdict: How to Choose a Scale for 3D Printing Materials
To choose the right scale for 3D printing materials, begin with:
your smallest normal measurement
and:
your largest complete physical load.
For:
-
Resin pigments
-
Additives
-
Filament samples
-
Small printed components
-
Miniatures
-
Material experiments
100–500g × 0.01g
is a strong precision range.
For broad small-material versatility:
500g × 0.01g
is particularly practical.
For:
-
Complete filament spools
-
Large resin bottles
-
Heavy prototypes
-
Multi-part assemblies
2–5kg × 0.1g
may be considerably more useful.
Do not choose a scale solely because it displays more decimal places.
Evaluate:
capacity, readability, minimum usable load, accuracy specifications, repeatability, tare, calibration, platform size and environmental stability.
For 3D-printing workflows spanning fractions of a gram through several kilograms, one of the most practical setups is:
a 500g × 0.01g precision scale for small materials and components
paired with:
a 2–5kg × 0.1g higher-capacity scale for spools, resin containers and large printed objects.
That combination gives you useful precision where small differences matter without sacrificing the capacity required for larger 3D-printing materials.