
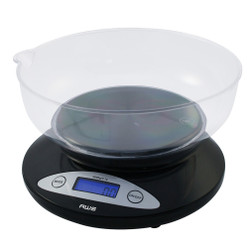
Choosing a scale for coffee beans starts with one simple question:
Will you weigh only the beans, or will you brew directly on the
scale?
If you only measure beans or grounds, a compact 500--750g scale with
0.1g readability can be more than enough. If you want to place a mug,
portafilter, pour-over brewer, carafe, and brewing water on the scale,
you need substantially more capacity and a larger platform. For many
complete coffee setups, a 3,000g scale with 0.1g readability is an
excellent target.
American Weigh Scales currently recommends the BARISTA-3KG as its
strongest overall coffee and pour-over option. It combines 3,000g
capacity, 0.1g readability, a built-in timer, splash-resistant
construction, and coffee-focused accessories.
If portability matters more than brewing directly on the platform, start
with the AWS pocket scales
collection.
This guide explains how to choose the right scale for coffee beans based
on readability, capacity, tare, response speed, timer functionality,
platform dimensions, calibration, repeatability, portability, and
brewing method. If you are comparing scale formats, AWS's Pocket Scale
vs. Kitchen Scale
guide
is also useful.
Quick Answer: What Scale Should You Choose for Coffee?
Use Suggested capacity Suggested readability
Coffee beans only 200--750g 0.1g
Espresso dose 200--750g 0.1g
Grounds in dosing cup 200--750g 0.1g
Espresso cup and output 500--1,000g+ 0.1g
AeroPress 1,000--3,000g 0.1g
Pour-over 2,000--3,000g+ 0.1g
French press 2,000--5,000g 0.1g
Cold brew vessel 3,000--5,000g+ 0.1g
Tiny experiments 100--250g 0.01g
For most coffee drinkers, 0.1g readability is the best starting
point. The Specialty Coffee Association provides
professional brewing education and standards that emphasize repeatable
measurement in coffee preparation.
Step 1: Decide What You Will Put on the Scale
Do not choose capacity from the coffee dose alone.
Your scale may need to support:
-
Coffee beans
-
Ground coffee
-
Dosing cup
-
Portafilter
-
Espresso cup
-
Mug
-
Dripper
-
Filter
-
Carafe
-
AeroPress
-
French press
-
Brewing water
Write down the heaviest combination you realistically expect to use.
That number determines the minimum capacity you should consider.
Step 2: Understand Readability
Readability is the smallest increment shown on the display.
Typical options include:
-
1g
-
0.1g
-
0.01g
-
0.001g
For coffee, smaller is not automatically better.
The goal is to obtain enough detail for repeatable brewing without
sacrificing capacity, platform size, stability, or usability.
Step 3: Choose 0.1g for Most Coffee Brewing
For most coffee preparation, 0.1g readability is highly practical.
It can display doses such as:
-
15.0g
-
18.0g
-
18.5g
-
20.0g
-
30.0g
That is enough detail for typical espresso and manual-brewing
adjustments.
AWS's current Best Scale for Coffee Beans and Espresso
Dosing
guide recommends 0.1g readability for most coffee preparation and
identifies it as the best balance of detail, stability, capacity, and
affordability.
Step 4: Decide Whether 0.01g Is Necessary
A 0.01g scale displays hundredths of a gram.
It can be useful for:
-
Very small experimental doses
-
Individual-bean comparisons
-
Specialized recipe testing
-
Other precision hobbies
But it is generally unnecessary for normal espresso, pour-over, French
press, AeroPress, or batch coffee.
The finer specification may come with:
-
Lower capacity
-
Smaller platform
-
Greater sensitivity to environmental conditions
For most coffee users, a 0.1g scale is more practical. The SCA Sample
Preparation
Standard
also provides a useful professional benchmark for precise coffee sample
weighing.
Step 5: Skip 0.001g Unless You Have a Specialized Need
A 0.001g scale reads in thousandths of a gram.
That level of readability is useful in specialized precision
applications, but ordinary coffee preparation rarely benefits from it.
Milligram scales can also be more sensitive to:
-
Drafts
-
Vibration
-
Static
-
Temperature
They often have small weighing pans and relatively low capacity.
For coffee, extra decimal places can make the scale less convenient
rather than more useful.
Step 6: Do Not Confuse Readability With Accuracy
Readability is not the same thing as accuracy.
A scale displaying 0.01g increments is not automatically more accurate
in real-world coffee use than a well-designed 0.1g brewing scale.
Also consider:
-
Repeatability
-
Calibration
-
Stable zero
-
Response speed
-
Operating environment
-
Manufacturer specifications
The complete performance of the scale matters.
Step 7: Choose Capacity for Beans Only
If you only weigh coffee beans before grinding, your capacity
requirements are modest.
A normal home dose might be tens of grams rather than hundreds.
A 200--750g scale therefore provides plenty of room for:
-
Beans
-
Grounds
-
Dosing cup
-
Small containers
AWS's current coffee guide lists 500g and 600g compact scales as useful
options for espresso dosing and coffee beans.
Step 8: Choose 500--750g for a Portable Dosing Scale
A 500--750g scale is a particularly useful range when you want:
-
Portability
-
Bean dosing
-
Espresso grounds
-
Travel coffee
-
Office coffee
-
Small containers
This capacity is much more than most individual doses require while
keeping the scale compact.
For more on compact formats, see AWS's Best Pocket Scales for Jewelry,
Coins, Coffee and
Crafts.
Step 9: Choose 2--3kg for Complete Brewing
If you brew directly on the scale, the total load grows quickly.
A pour-over setup may include:
-
Carafe
-
Dripper
-
Filter
-
Coffee
-
Several hundred grams of water
A 3kg scale is therefore much more versatile than a pocket scale.
AWS currently lists its BARISTA-3KG at 3,000g x 0.1g and positions it
for coffee and pour-over preparation.
Step 10: Choose 5kg for Heavy Equipment
A 5kg scale can make sense when you regularly use:
-
Heavy French presses
-
Large carafes
-
Large brewing vessels
-
Bowls
-
General kitchen ingredients
It also makes one scale more useful beyond coffee.
However, do not buy extra capacity at the expense of useful readability.
A 5kg scale that reads only to whole grams may be less useful for
espresso than a 3kg scale reading to 0.1g.
Step 11: Leave Capacity Headroom
Avoid selecting a scale that barely supports your normal setup.
Example:
-
Carafe = 400g
-
Dripper = 150g
-
Coffee = 30g
-
Water = 500g
Total:
1,080g
A 1kg scale is insufficient.
A 2kg scale can handle the load, while a 3kg scale gives you
substantially more headroom.
Step 12: Remember That Tare Does Not Restore Capacity
Tare changes the displayed reading, not the physical load.
Suppose:
-
Dosing cup = 80g
-
Coffee = 20g
The gross load is 100g.
If you tare the cup, the display may show 0.0g before adding coffee, but
the scale is still supporting the cup.
AWS explains the relationship between capacity and readability in What
Does 500g x 0.01g Mean on a Digital
Scale?.
Step 13: Make Tare a Priority
For coffee, tare is essential.
To dose beans:
-
Place the dosing cup on the scale.
-
Press tare.
-
Confirm zero.
-
Add coffee.
-
Stop at your target dose.
The same feature lets you zero a mug, brewer, or carafe before adding
ingredients.
Without tare, coffee preparation becomes unnecessarily cumbersome.
Step 14: Consider a Built-In Timer
A timer is optional for bean dosing but highly useful for brewing.
It helps track:
-
Espresso extraction time
-
Pour-over bloom
-
Pour intervals
-
Total pour-over time
-
AeroPress steep time
A built-in timer allows weight and time to be monitored on the same
device.
That is one reason a dedicated coffee scale can be more useful than a
generic pocket scale.
Step 15: Check Response Speed
Response speed is especially important for dynamic brewing.
During pour-over, water is continuously added.
During espresso, beverage output increases rapidly.
A slow display can lag behind the actual mass on the platform.
For bean dosing, this matters less.
For espresso yield and pour-over, it matters much more.
Step 16: Check Repeatability
Repeatability means the same stable load produces similar results when
measured repeatedly under similar conditions.
A simple check:
-
Confirm zero.
-
Place a dosing cup on the platform.
-
Record the reading.
-
Remove it.
-
Wait for zero.
-
Repeat.
Consistent behavior is important because coffee recipes depend on
repeatable measurements.
Step 17: Check Platform Size
A scale can have enough capacity but still be physically too small.
Check whether the platform can support your:
-
Dosing cup
-
Portafilter
-
Espresso cup
-
Mug
-
Dripper
-
Carafe
If part of the vessel rests on the countertop, the scale is not
supporting the complete load.
Step 18: Measure Espresso-Machine Clearance
If you plan to weigh espresso output beneath the group head, physical
dimensions become critical.
Check:
-
Scale width
-
Scale depth
-
Scale height
-
Cup height
-
Drip-tray clearance
A large kitchen scale may have excellent specifications and still be
unusable beneath your espresso machine.
Step 19: Look for Splash Resistance
Coffee preparation involves water.
A brewing scale may encounter:
-
Drips
-
Espresso
-
Wet cups
-
Condensation
-
Minor spills
Splash resistance is therefore valuable.
Do not interpret splash resistance as permission to immerse the scale.
Follow the manufacturer's care instructions.
Step 20: Consider a Removable Silicone Mat
A silicone mat can:
-
Protect the platform
-
Improve cup grip
-
Catch small drips
-
Simplify cleanup
This is particularly useful on a scale used beneath an espresso machine
or for pour-over.
Step 21: Choose a Clear Display
A good coffee scale should be easy to read while you are actively
brewing.
Look for:
-
Large digits
-
Clear decimal placement
-
Visible unit indicator
-
Backlighting
-
Timer display
-
Good viewing angle
Make sure a mug or carafe will not completely block the display.
Step 22: Use Grams
Grams are the most convenient general-purpose unit for coffee recipes.
NIST explains the SI framework for mass and the relationship between
grams and kilograms.
The NIST SI Units -- Mass
reference explains the standardized mass framework behind grams and
kilograms. Using grams makes recipe calculations straightforward.
For example:
-
18g coffee
-
36g espresso output
-
20g coffee
-
320g brewing water
There is no need to estimate coffee by scoops.
Step 23: Use the Scale for Coffee-to-Water Ratios
A scale makes ratios easy to repeat.
Example: 1:16
20g coffee × 16 = 320g water
Example: 1:17
30g coffee × 17 = 510g water
The SCA Brewing Control
Chart
is a useful professional reference for understanding brewing strength
and extraction. You can then taste the result and adjust the ratio
intentionally.
The advantage is not that one ratio is universally correct. The
advantage is that you know exactly what you used.
Step 24: Look for Calibration
A precision coffee scale should have a clear calibration procedure.
Check:
-
Whether user calibration is supported
-
Which calibration mass is required
-
Whether it is included
-
How calibration mode works
AWS provides a detailed guide in How to Calibrate a Digital Scale for
Accurate
Results.
Use the specified calibration mass rather than an arbitrary bag of beans
or household object.
Step 25: Know When to Check Calibration
Follow the manufacturer's instructions.
It can be sensible to check scale performance:
-
After transportation
-
After extended storage
-
After significant temperature changes
-
When readings appear unusual
-
After accidental overload
Before recalibrating, also check the surface, batteries, platform, and
environment.
Step 26: Choose a Stable Surface
Place the scale on a hard, stable counter.
Avoid:
-
Towels
-
Soft mats beneath the scale
-
Wobbly tables
-
Uneven surfaces
-
Flexible trays
A scale needs stable support to perform consistently.
Step 27: Avoid Strong Airflow
Air movement is not usually as critical for a 0.1g coffee scale as for a
milligram balance, but strong drafts can still interfere with stable
readings.
Avoid placing the scale directly beside:
-
Fans
-
HVAC vents
-
Open windows
This is especially relevant for small bean doses.
Step 28: Consider Battery Power
Battery-powered scales are convenient for:
-
Travel
-
Coffee carts
-
Office kitchens
-
Moving between stations
Keep replacement batteries available if the scale is important to your
daily workflow.
Unusual behavior can sometimes be related to weak batteries.
Step 29: Consider Rechargeable Power
A rechargeable scale can be convenient for a permanent coffee station.
Benefits include:
-
Easy routine charging
-
Less dependence on disposable batteries
-
Convenient countertop use
Neither battery system is universally better.
Choose according to where and how the scale will be used.
Step 30: Check Auto-Off Behavior
Auto-off conserves power but can interrupt coffee preparation.
This can be frustrating during:
-
Grinder adjustment
-
Pour-over setup
-
Bloom
-
Longer manual brews
Check whether the scale stays active long enough for your normal
workflow.
Best Scale for Espresso Beans
For weighing beans before grinding:
500--750g x 0.1g
is an excellent general-purpose range.
Prioritize:
-
Fast tare
-
Compact dimensions
-
Stable readings
-
Easy-to-read display
-
Portability
You do not need 3kg capacity if the scale never supports the cup or
portafilter.
Best Scale for Espresso Dosing
If you weigh grounds in a dosing cup, a compact scale is ideal.
If you place the portafilter directly on the scale, make sure:
-
Capacity is sufficient
-
Platform is large enough
-
Portafilter balances securely
A heavy portafilter can consume most of a small scale's capacity before
coffee is added.
Best Scale for Espresso Yield
For weighing the beverage during extraction, look for:
-
0.1g readability
-
Fast response
-
Timer
-
Tare
-
Compact footprint
-
Splash resistance
Physical fit beneath the espresso machine is critical.
Best Scale for Pour-Over
For pour-over, a 2--3kg+ x 0.1g scale is a strong choice.
The scale must support:
-
Carafe or cup
-
Dripper
-
Filter
-
Coffee
-
Water
A timer is particularly valuable because pour-over recipes often use
timed stages.
Best Scale for AeroPress
AeroPress users can choose based on whether the entire brewer is placed
on the scale.
For complete brewing:
1--3kg x 0.1g
provides plenty of flexibility for many setups.
For bean dosing only, a pocket scale is enough.
Best Scale for French Press
French presses can be heavy.
Calculate:
empty press + coffee + water
A 3--5kg scale may be more practical than a compact dosing scale.
Platform size is also important.
Best Scale for Cold Brew
If you only weigh the dry coffee, a 500--750g scale may be sufficient.
If you place a complete cold-brew vessel on the scale, choose
substantially more capacity.
Large batches may justify 3--5kg or more.
Best Scale for Travel Coffee
For travel, prioritize:
-
Compact size
-
Battery power
-
Protective cover
-
0.1g readability
-
200--750g capacity
A pocket scale is ideal for pre-weighing beans.
For complete travel brewing, calculate the full load first.
Best Scale for Office Coffee
For an office where the scale is primarily used for beans:
500--750g x 0.1g
is compact and practical.
For a shared pour-over station:
2--3kg x 0.1g
is more versatile.
Pocket Scale vs. Dedicated Coffee Scale
Choose a Pocket Scale If You:
-
Weigh beans only
-
Weigh grounds
-
Travel frequently
-
Need compact storage
-
Use small dosing cups
Choose a Dedicated Coffee Scale If You:
-
Brew directly on the scale
-
Make pour-over
-
Measure espresso yield
-
Need a timer
-
Need a larger platform
-
Want more splash protection
The right scale format follows the workflow.
Coffee Scale vs. Kitchen Scale
A kitchen scale can work well for coffee if it offers:
-
0.1g readability
-
Fast response
-
Tare
-
Adequate capacity
-
Suitable platform
Many general kitchen scales prioritize high capacity and read only to
1g.
That may be adequate for large batches but less useful for espresso
dosing.
Should You Own Two Coffee Scales?
Some coffee enthusiasts benefit from two scales.
Scale One: Compact Dosing Scale
500--750g x 0.1g
Use for:
-
Beans
-
Grounds
-
Grinder station
-
Travel
Scale Two: Brewing Scale
3kg x 0.1g
Use for:
-
Pour-over
-
Espresso output
-
AeroPress
-
Carafes
-
Water measurement
This arrangement prevents one scale from having to satisfy conflicting
size and capacity requirements.
Coffee Scale Buying Checklist
Before purchasing, answer these questions:
-
Will I weigh beans only?
-
Will I brew directly on the scale?
-
What is my typical coffee dose?
-
What is the heaviest container?
-
What is the heaviest complete setup?
-
Is 500--750g enough?
-
Do I need 2--3kg?
-
Would 5kg be useful?
-
Does the scale read to 0.1g?
-
Do I genuinely need 0.01g?
-
Is response speed suitable for brewing?
-
Does it have tare?
-
Does it have a timer?
-
Does it measure grams?
-
Is the platform large enough?
-
Will it fit beneath my espresso machine?
-
Can I see the display with the vessel in place?
-
Is it splash resistant?
-
Is there a removable mat?
-
Can it be calibrated?
-
What calibration mass is required?
-
Is it battery powered or rechargeable?
-
Does auto-off interfere with brewing?
-
Is it easy to clean?
-
Will it travel well?
Common Mistakes When Choosing a Coffee Scale
Choosing by Decimal Places Alone
More decimals do not automatically improve coffee.
Buying Too Little Capacity
Remember the vessel and water.
Buying Huge Capacity With Poor Readability
High capacity does not compensate for a scale that is too coarse for
your recipe.
Ignoring Platform Size
The equipment must physically fit.
Forgetting Espresso-Machine Clearance
A scale may be too tall or wide.
Ignoring Response Speed
Dynamic brewing needs responsive measurements.
Skipping Tare
Tare is essential for convenient dosing.
Assuming Tare Restores Capacity
It does not.
Ignoring a Timer
A timer is extremely useful for espresso and pour-over.
Buying 0.001g for Normal Brewing
That level of readability is generally unnecessary.
Ignoring Water Exposure
Coffee preparation happens around liquid.
Skipping Calibration Instructions
A precision scale should have a clear calibration process.
How to Weigh Coffee Beans
-
Put the scale on a hard, stable surface.
-
Turn it on with the platform empty.
-
Select grams.
-
Place your dosing cup on the platform.
-
Press tare.
-
Add beans gradually.
-
Stop at the target dose.
-
Grind and brew.
This makes the coffee dose easy to repeat.
How to Use a Scale for Pour-Over
-
Place the scale on a stable counter.
-
Put the carafe and brewer on the platform.
-
Add filter and coffee.
-
Tare.
-
Start the timer.
-
Add bloom water.
-
Continue pouring according to the recipe.
-
Watch cumulative water mass.
-
Stop at the final target.
-
Record total brewing time if you are refining the recipe.
A brewing scale lets you control both time and mass.
How to Use a Scale for Espresso
For dry dose:
-
Place a dosing cup on the scale.
-
Tare.
-
Add beans or grounds.
-
Stop at the target.
SCA research on contemporary
espresso
illustrates the usefulness of tracking espresso dose, beverage output,
and extraction variables by measurement.
For beverage output:
-
Put the espresso cup on the scale beneath the machine.
-
Tare.
-
Start the timer.
-
Begin extraction.
-
Monitor beverage mass.
-
Stop according to your chosen recipe.
This lets you compare dose, yield, and time from shot to shot.
Why a Scale Helps Improve Coffee
A scale does not automatically make coffee taste better.
It makes the process measurable.
If yesterday's coffee was excellent, you can repeat:
-
Dose
-
Water mass
-
Ratio
-
Brew time
If today's cup tastes different, you have fewer unknown variables.
That is the real advantage of precision weighing in coffee preparation.
Frequently Asked Questions
What scale should I use for coffee beans?
For beans alone, a 500--750g scale with 0.1g readability is a strong
choice. For complete brewing, consider a 2--3kg+ scale with 0.1g
readability.
Is 0.1g good enough for coffee?
Yes. It is a practical level of readability for most espresso and
manual-brewing applications.
Do I need 0.01g?
Usually not. It is more useful for specialized experiments than everyday
brewing.
Do I need 0.001g?
No for normal coffee preparation.
Is 500g enough?
For beans, grounds, and small dosing containers, generally yes. It may
be insufficient for a full brewer or heavy portafilter setup.
Is 600g enough?
Yes for most bean-focused workflows.
Is 3kg enough?
For many pour-over, AeroPress, and coffee-station setups, 3kg is highly
versatile.
Do I need 5kg?
Choose 5kg for heavy brewers, large batches, or multipurpose kitchen
use.
Does a coffee scale need tare?
Yes. Tare makes weighing beans and brewing ingredients much easier.
Does tare increase maximum capacity?
No.
Do I need a timer?
Not for beans alone. A timer is highly useful for espresso, pour-over,
and other time-sensitive methods.
Does response speed matter?
Yes, particularly when water or espresso is actively flowing.
Should the scale measure grams?
Yes. Grams make coffee recipes and ratios easy to calculate and repeat.
Can I use a pocket scale?
Yes. Pocket scales are excellent for coffee beans, grounds, travel, and
small dosing cups.
Can I use a kitchen scale?
Yes, provided its readability, response speed, capacity, and platform
size fit your coffee workflow.
What is best for espresso?
Look for 0.1g readability, fast response, tare, timer, compact
dimensions, and splash resistance.
What is best for pour-over?
Look for 2--3kg+ capacity, 0.1g readability, tare, timer, fast response,
large platform, and splash resistance.
Should I calibrate my coffee scale?
Follow the manufacturer's instructions. Calibration or performance
checks can be useful after transport, storage, major environmental
changes, or unexplained readings.
Final Verdict: How to Choose a Scale for Coffee Beans
For most coffee drinkers, start with 0.1g readability.
Then choose capacity around the complete workflow:
-
200--750g x 0.1g: beans, grounds, espresso dosing, travel
-
1--2kg x 0.1g: compact brewing setups
-
3kg x 0.1g: excellent all-around capacity for pour-over,
AeroPress, espresso output, mugs, and carafes -
5kg x 0.1g: heavy brewers, large batches, and general kitchen
use -
0.01g: specialized small-dose experiments
-
0.001g: generally unnecessary for coffee
If you only weigh coffee beans, prioritize portability, fast tare,
stable readings, and a compact platform.
If you brew directly on the scale, prioritize capacity, response speed,
platform size, a built-in timer, display visibility, and splash
resistance.
The best scale is not the one with the highest capacity or the most
decimal places. It is the scale that fits your actual coffee equipment
and gives you enough measurement detail to make your recipes repeatable.